That moment when HDB hands you the keys. Years of waiting, ballot anxiety, construction updates on My HDBPage. Finally over.
You’re standing in your empty flat. Bare walls. That new concrete smell. Mind already racing through Pinterest boards and renovation ideas.
But here’s what we see happen too often. New BTO owners rush into aircon installation without proper planning. They book the cheapest installer. Skip the defect check. End up with units installed in wrong locations, undersized systems struggling to cool, or worse, HDB compliance issues that force them to redo everything.
We’ve been installing aircon in new BTO flats across Singapore for years. The owners who do it right follow a system. Those who rush regret it within months.
This 7-day checklist breaks down exactly what to do after collecting your BTO keys, specifically for aircon installation. Not generic advice. Specific steps that prevent expensive mistakes.
Day 0: Key Collection Day – What Most People Miss
You’ve just completed the appointment at HDB Hub. Keys in hand. Excitement through the roof.
Before you do anything else, there’s critical information you need to gather. Most of it is in your HDB Welcome Kit, but people often toss it aside in their excitement.
Check Your Flat’s Electrical Loading
This determines what aircon system you can install.
HDB flats built after January 1, 1994 (or those that underwent the Main Upgrading Programme or Home Improvement Programme) have 40-amp main switches. These flats can handle more powerful aircon systems without electrical upgrades.
Older flats have 30-amp main switches. This creates a strict “power budget.” For example, a 4-room flat with 30-amp loading has a total running current cap of around 8.50 amps for all aircon units combined. You might be limited in what systems you can install.
Your BTO is almost certainly a newer flat with 40-amp capacity. But verify this. The information is on HDB’s website, or you can check physically at your flat’s distribution board.
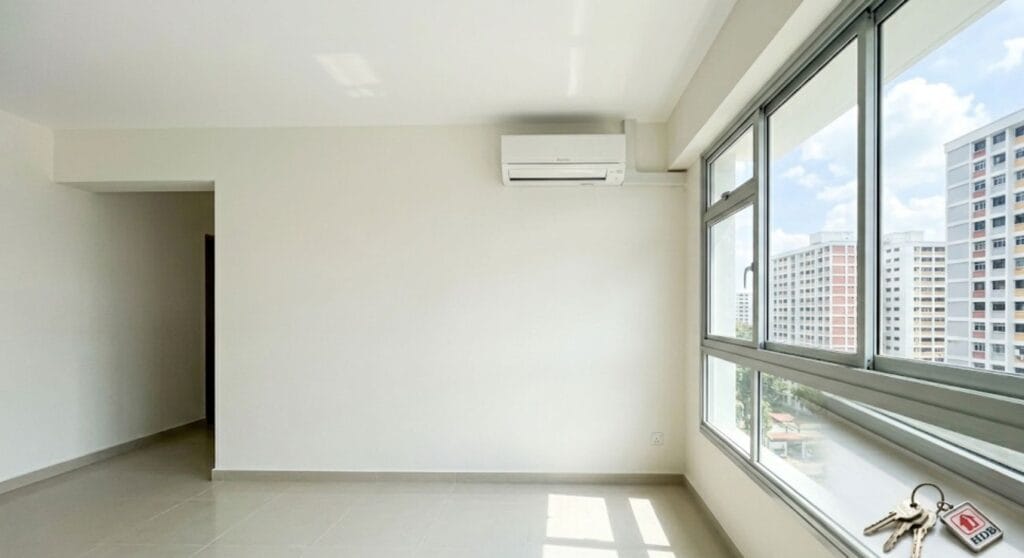
Locate Your Aircon Ledge
All new BTO flats come with a purpose-built concrete aircon ledge. This is the only approved location for your outdoor compressor. No exceptions.
Find it. Photograph it. Note its size and position relative to your rooms.
Why does this matter? The ledge location affects your piping routes, which affects installation cost and complexity. If the ledge is far from your master bedroom, expect longer pipe runs and higher costs.
Get Your SP Services Account Ready
You’ll need electricity for the defect inspection and any early work. SP Services requires at least one day to activate your account after application.
Apply online before or immediately after key collection. Having power ready from Day 1 means you’re not scrambling later.
Day 1: The Defect Inspection (Non-Negotiable)
This step happens before any renovation. Before any aircon installation. Before anything.
Every new BTO flat in Singapore comes with a 1-year Defects Liability Period (DLP) starting from the date of key collection. During this period, HDB will fix construction defects for free.
The 30-Day Rule
HDB strongly recommends reporting defects within 30 days of key collection and before renovation begins. Here’s why this matters for aircon.
If your contractor drills holes for piping and later discovers a crack in the wall, who’s responsible? If your aircon installation happens first and then water seepage appears, was it the installation or a pre-existing defect?
These disputes get messy. Avoid them by completing your defect inspection before any work starts.
What to Check (Aircon-Relevant)
While doing your full flat inspection, pay special attention to:
The aircon ledge. Look for cracks, uneven surfaces, or drainage issues. Water should flow away from the building, not pool on the ledge.
Walls where indoor units will be mounted. Tap them. Listen for hollow sounds that might indicate poor plastering. Check for visible cracks.
The areas near windows where trunking will run. Any defects here should be fixed before your installer routes pipes through.
Ceiling corners where drainage pipes might be installed. Water stains or dampness suggest existing issues.
How to Report
You’ll receive a Defects Feedback Form within 7 days of key collection. Fill it thoroughly. Take photos of everything. Submit to your estate’s Building Service Centre (BSC) or online through the HDB portal.
Keep copies. You’ll need proof that defects existed before your renovation if disputes arise later.
HDB typically completes rectification within 2 weeks. Plan your renovation timeline around this.
Day 2-3: Planning Your Aircon System
With defect inspection done or scheduled, now you plan the actual aircon system. This decision affects your comfort for the next 10-15 years.
Choosing System 2, 3, or 4
New BTO flats only have space for one outdoor compressor on the aircon ledge. That’s why multi-split systems (one outdoor unit connected to multiple indoor units) are standard in Singapore HDB flats.
The “System” number refers to how many indoor units connect to that single outdoor compressor.
For 3-Room BTO (approximately 65-70 sqm): System 2 is typically sufficient. One unit for master bedroom, one for living room. If the second bedroom is regularly used (home office, child’s room), consider System 3.
For 4-Room BTO (approximately 90 sqm): System 3 is the most common choice. Master bedroom, second bedroom, living room. Some owners go System 4 if they want all spaces air-conditioned.
For 5-Room BTO (approximately 110 sqm): System 3 or System 4 depending on usage. Living rooms in 5-room flats need higher capacity units (12,000-18,000 BTU), while bedrooms work fine with 9,000 BTU.
BTU Sizing Matters
BTU (British Thermal Units) measures cooling capacity. Get this wrong and you’ll either have a unit struggling to cool (undersized) or one that short-cycles and creates clammy air (oversized).
General Singapore guidelines:
- Small bedroom (under 100 sqft): 6,000-9,000 BTU
- Standard bedroom (100-150 sqft): 9,000-12,000 BTU
- Master bedroom (150-200 sqft): 12,000-15,000 BTU
- Living room (200-300 sqft): 15,000-18,000 BTU
- Large living room (300+ sqft): 18,000-24,000 BTU
West-facing rooms need approximately 20-30% more BTU than these guidelines. If your master bedroom faces the afternoon sun, size up.
Inverter vs Non-Inverter
For 2025, there’s really only one answer: inverter technology.
Inverter aircons adjust compressor speed based on room temperature. They use less energy, operate more quietly, and maintain more consistent temperatures. The upfront cost is higher, but energy savings over 10 years more than compensate.
Non-inverter units are only worth considering for rooms with very infrequent use, and even then, the price difference has narrowed significantly.
Brand Considerations
The dominant brands in Singapore BTO installations are Daikin, Mitsubishi Electric, and Panasonic. All three are reliable with good service networks.
Daikin: Known for air purification features and eco-refrigerants. Strong presence in Singapore market.
Mitsubishi Electric: Often rated highest for quiet operation (some models under 19dB). Starmex series is extremely popular for HDB.
Panasonic: Nanoe™ air purification technology appeals to families with allergies. Econavi sensors help with efficiency.
Budget options like Midea and LG offer good value for rental properties or secondary rooms but may not match the longevity of Japanese brands.
For a typical 4-room BTO, expect to pay S$2,700-4,500 for a quality System 3 setup including basic installation.
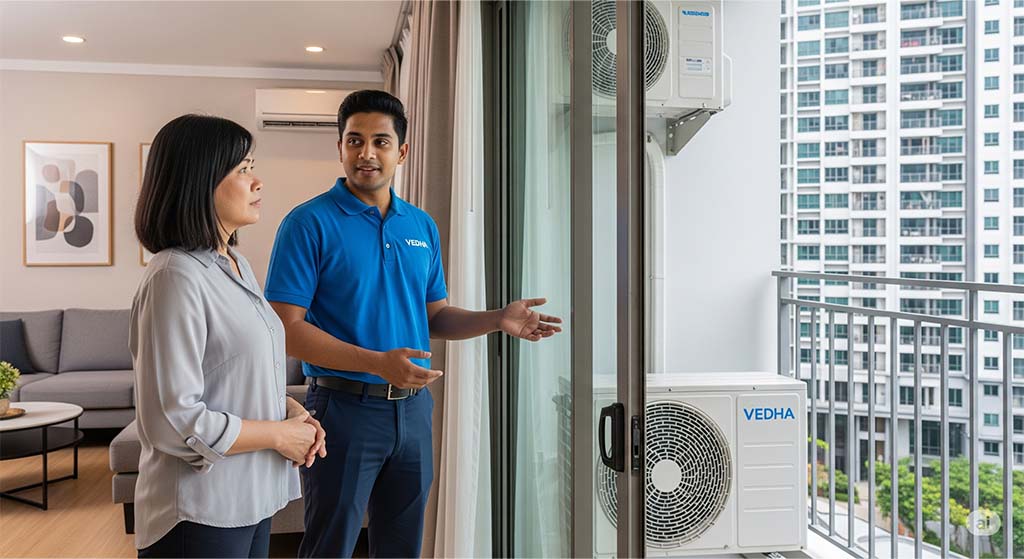
Day 4: Engaging Your Aircon Installer
This is where many BTO owners make costly mistakes. The rules around aircon installation in HDB are strict, and violations can result in fines or forced removal.
BCA-Trained Installer: Non-Negotiable
HDB mandates that all aircon installations be performed by installers trained by the Building and Construction Authority (BCA). This isn’t a suggestion. It’s a legal requirement.
BCA-trained installers understand:
- Proper mounting methods that won’t compromise building structure
- Drainage requirements to prevent water discharge onto external walls
- Electrical safety standards
- Documentation requirements
Ask any installer for their BCA credentials before engaging them. If they can’t produce proof, walk away. The cheapest quote often comes from unlicensed operators, and those savings evaporate when HDB orders you to redo the installation.
What to Ask During the Site Survey
A reputable installer will conduct a site survey before quoting. During this visit, get answers to:
Where exactly will indoor units be mounted? The position affects cooling efficiency and aesthetics.
What’s the piping route? Shorter routes mean less material cost and fewer potential leak points.
How will drainage be handled? All condensation must discharge into internal floor traps. Pipes dripping down external walls violate HDB rules.
What materials will be used? Insist on quality: stainless steel brackets (Grade SS 304), proper Armaflex insulation (½-inch thickness), and reputable cable brands like Sigma or Keystone.
What’s the total electrical load? Verify this fits within your flat’s capacity.
Understanding the Quote
A proper quotation should itemize:
- Aircon unit(s) – brand, model, BTU rating for each
- Installation labour – varies by complexity
- Piping materials – copper pipes, insulation, trunking
- Electrical work – wiring, power points if needed
- Brackets and mounting hardware
- Drainage pipes and connections
Red flag: quotes that bundle everything into one lump sum without breakdown. You can’t compare value if you don’t know what you’re paying for.
For a new BTO (the simplest installation scenario), expect total costs of:
- System 2: S$2,000-3,500
- System 3: S$2,700-4,500
- System 4: S$3,500-5,500
Prices vary based on brand choice and materials quality.
Day 5: Coordinating With Your Renovation Contractor
Aircon installation doesn’t happen in isolation. It needs to be sequenced correctly with your overall renovation.
The Coordination Challenge
Your renovation contractor handles hacking, electrical first fix, carpentry, tiling, and painting. Your aircon installer handles the aircon system. These two need to work together.
Poor coordination creates problems:
Carpentry installed before aircon piping means visible trunking running over your beautiful false ceiling.
Painting done before aircon installation means touch-up work after installers drill holes.
Electrical points not positioned correctly for the aircon means extension cords or expensive rewiring.
When Aircon Installation Should Happen
In a typical BTO renovation sequence:
- Defect rectification (HDB)
- Hacking works
- Electrical and plumbing first fix ← Aircon piping can happen here
- Ceiling and partition work
- Tiling and wet works
- Carpentry installation
- Painting
- Aircon indoor/outdoor unit installation ← Complete aircon here
- Electrical fittings
- Final cleaning
The piping (copper refrigerant lines, drainage, electrical cables) should be routed during the electrical first fix phase, before carpentry and ceilings go up. This allows pipes to be concealed.
The actual units get mounted later, typically after painting but before final touch-ups.
Communication Between Contractors
Make sure your renovation contractor and aircon installer talk directly, or at minimum, have detailed floor plans showing:
- Indoor unit positions
- Outdoor unit position on ledge
- Piping route
- Electrical point locations
- Drainage discharge points
Many renovation ID firms include basic aircon coordination. Confirm this is part of their service.
Day 6: Documentation and Permits
Paperwork. Not exciting, but getting it wrong creates headaches.
The HDB Installation Report
After aircon installation is complete, your BCA-trained installer must submit an installation report to the HDB Branch managing your flat within 14 days.
This report confirms:
- Installation was performed by qualified personnel
- Work follows HDB guidelines
- Safety requirements are met
Keep a copy for your records. If issues arise later, this document proves proper procedures were followed.
SP Services Form CS/5H
If your installation involves new electrical wiring or a new power point, Form CS/5H must be submitted to SP Services Ltd for testing and certification.
Most new BTO flats already have adequate power points for aircon. But if your system requires additional electrical work, this form is mandatory. Your installer or their licensed electrical contractor handles submission.
No Separate Renovation Permit Needed
Good news: aircon installation in newer HDB flats with 40-amp loading doesn’t require a separate HDB renovation permit. However, your overall renovation does need proper permits for structural and electrical works.
Make sure your renovation contractor has submitted the necessary applications before work begins. The standard renovation permit process takes 2-3 weeks for approval.
Day 7: Final Checks Before Installation Day
You’re almost ready. Before the installers arrive, a few final preparations.
Prepare the Space
Clear the areas where indoor units will be mounted. Move furniture at least 2 meters away from walls. Cover items that can’t be moved with plastic sheets. Drilling creates dust.
Ensure clear access to the aircon ledge. If the ledge is accessed through a window, make sure installers can reach it safely.
Confirm the Schedule
Call your installer to reconfirm:
- Date and time
- Expected duration (typically 4-8 hours for a System 3 in new BTO)
- Materials being brought
- Number of technicians arriving
A standard HDB System 3 installation takes one full day. Complex setups may extend to two days.
Prepare Questions for the Handover
When installation completes, you should understand:
- How to operate each unit and remote
- What the error codes mean
- Recommended temperature settings
- First-use testing procedures
- Warranty terms and coverage
- When to schedule first servicing (typically 3 months after installation)
Get the installer’s contact for any post-installation questions.
Installation Day: What to Expect
The installation sequence for a typical BTO multi-split system:
Morning (3-4 hours):
- Site preparation and protection
- Outdoor unit positioning on ledge
- Drilling for piping passages
- Running copper pipes and drainage lines
- Electrical cabling
Afternoon (2-3 hours):
- Indoor unit mounting
- Connecting refrigerant lines
- Vacuum testing for leaks
- Gas charging
- Electrical connections
- System testing
Final Hour:
- Individual unit testing
- Drainage verification
- Remote control programming
- Cleanup
- Handover and demonstration
Stay accessible throughout. Decisions may be needed if installers encounter unexpected issues.
The 2025 Price Reality
For transparency, here’s what BTO owners typically pay in 2025 for quality aircon installation:
System 3 (Most Common for 4-Room BTO):
- Mitsubishi Starmex 5-tick: S$2,800-3,600 (unit only)
- Daikin iSmileEco 5-tick: S$2,600-3,400 (unit only)
- Installation labour: S$400-800
- Materials (pipes, trunking, etc.): included in most packages
- Total: S$3,200-4,400
System 4 (For 5-Room BTO or Full Coverage):
- Quality 5-tick system: S$3,500-4,500 (unit only)
- Installation: S$500-1,000
- Total: S$4,000-5,500
Climate Vouchers can offset up to S$400 for 5-tick NEA-rated models. Check eligibility and claim process on NEA’s website.
Quotes significantly below these ranges should raise questions about material quality or installer credentials.
Common Mistakes We See in New BTOs
Mistake 1: Installing Before Defect Rectification
Owner installs aircon, then discovers wall cracks. Now it’s unclear whether the cracks existed before or were caused by installation drilling. HDB won’t cover it. A completely avoidable problem.
Mistake 2: Undersizing the System
Budget constraints lead owners to choose System 2 when they really need System 3. Living room stays warm. Master bedroom barely copes on hot days. Adding a unit later costs more than doing it right initially.
Mistake 3: Skipping the Site Survey
Engaging an installer over WhatsApp based on price alone. No site visit. Installation day arrives, and the quote increases because “actual conditions differ from standard.” Always insist on physical site survey before committing.
Mistake 4: Using the Aircon Ledge for Storage
The ledge is exclusively for your outdoor compressor. No laundry racks. No plants. No storage boxes. Blocking airflow reduces efficiency and creates fire hazards. Town councils conduct checks.
Mistake 5: Ignoring Drainage Design
Condensation water must discharge into internal floor traps. Some owners ask installers to route drainage outside because it’s “easier.” This violates HDB rules and creates water staining on external walls.
After Installation: First 30 Days
Your aircon is in. The work isn’t quite done.
Test Thoroughly in the First Week
Run each unit for extended periods. Check:
- Does it reach set temperature within reasonable time?
- Any unusual noises during operation?
- Any water dripping from indoor units?
- Does drainage flow properly?
- Do remotes work from normal positions?
Report issues immediately. Most installers provide a workmanship warranty (typically 1 year) covering installation-related problems.
Document for Warranty
Keep all receipts, warranty cards, and the installer’s contact information. Create a simple file with:
- Purchase date and invoice
- Installation date and report
- Model numbers and serial numbers
- Warranty terms
- Installer contact details
You’ll need these for warranty claims or when selling the flat.
Schedule First Servicing
Book your first aircon servicing for approximately 3 months after installation. This catches any early issues and establishes your maintenance history.
For new units, basic servicing (filter cleaning, drainage check, general inspection) is sufficient. Chemical wash isn’t needed until 12-18 months of regular use.
Getting aircon right in your new BTO isn’t complicated. It just requires doing things in the correct sequence and avoiding shortcuts that create problems later.
Your flat waited years to be built. Your aircon will serve you for 10-15 years. One week of careful planning ensures both live up to their potential.
Planning aircon installation for your new BTO? Vedha Construction specializes in HDB installations with BCA-certified technicians who understand all the requirements. We handle site surveys, proper documentation, and quality installation. Call 96540044 or book through our website for a free consultation.

We specialize in Aircon installation, repair, and service. We have all type & model of recon compressor, full set & fancoil. Our technicians are highly proficient in their respective field and repairs and fixes aircon of various brands.